Juniper Wall
| Juniper Wall | |
 | |
| Rock Type | Natural Carboniferous Limestone |
|---|---|
| Climbing Style | Trad |
| Approach Time | 30 minutes |
| Area | Gower |
| Sub Area | Thurba to Overton |
| Local Area | Paviland and Juniper Wall |
| Geodata | |
| WGS-84 Location | 51.549429, -4.253615 |
| OS Grid Ref. | SS 438 858 |
| WGS-84 Parking Location | 51.561586, -4.242797 |
| GR Parking Location | SS 446 871 |
| Parking Postcode | SA3 1PE |
| Base Elevation | 15 metres (Other) |
| General Info | |
| Faces Direction | South East |
| Aspect | Partially Sunny |
| Wind Sheltered | Mostly |
| Climbing Type | Normal |
| Seepage | Quick drying |
| Crags Within 400m | |
|
Above Freelunchers Zawn, Below East Gully Groove, Blackhole Gut, Devil's Cwm, Eos Zawn, Fetlock Zawn, Hollow Top, Horses Cliff, Juniper Wall, Liberty Zawn, Paviland Far Far Far West, Paviland Far Far West, Paviland Far West, Paviland Main Cliff, Paviland Way Out West, Stalking Horse Zawn, Stallion Cove, Yellow Buttress | |
| Juniper Wall | |
| Trad Grades | |
| <= HVS | 11 |
| E1 - E3 | 3 |
| E4 - E5 | 2 |
| >= E6 | 0 |
Contents
TIDAL STATUS
Non-tidal.
BOLTING POLICY
No bolting.
PREAMBLE
One of Gower's best crags for those climbing at VS and above. Situated in a beautiful and remote part of Gower, the long walk is well worth the effort. Juniper Wall is the location of Gower's best HVS, viz., Assassin.
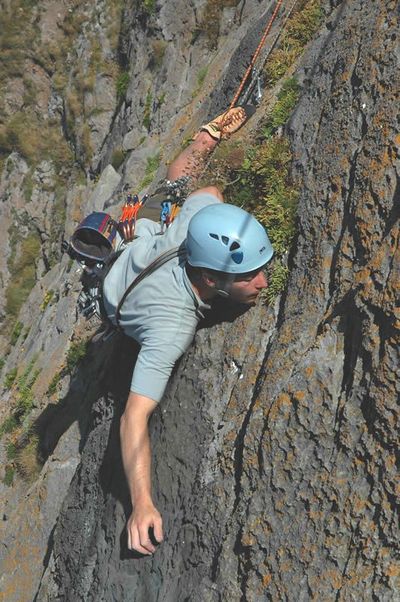
Don't be put off by the topo photograph. The crag is notoriously difficult to photograph.
ACCESS
Access from the free parking at Pilton Green, (SS 446 871 or 51.561586, -4.242797). On the right-hand side of the B4247, approx. 2 miles before Rhossili. Park on the grass at the edge of the track leading to a farm. Cross the road, bear left and take the public footpath (signposted to Foxhole Slade) through the 'kissing-gate' on the left of the sandy-coloured house (Clifflands). Reach the top of a dry valley after about 20 minutes and numerous gates. (1.34km). At the landward end of the valley is a wooden kissing-gate (SS 438860).
Go through the kissing gate, descend a short way (to the Wales Coast Path) and then turn left (east - signposted to Port Eynon) up the steep side of the valley and then head east for 160m on the path until you get to a broad vague valley leading down to the sea. Follow the valley downwards (for 200m) on a narrow path.
From the bottom of the valley, traverse around the right (west) side of the zawn and then scramble around rocks to reach the sloping grassy terrace below Juniper Wall.
It's usually easier, however, to leave rucksacks at the top of the cliff. In which case, head out to the end of the headland before the dry valley. Dunp the rucksacks and go down the steep grassy slope on the east flank of the headland until you are just above the zawn. From here, scramble round westwards (R) to the grassy terrace.
DESCENTS
Descent from the main cliff is by following the steep grassy slope down the east (right) flank and doubling back round.
THE ROUTES
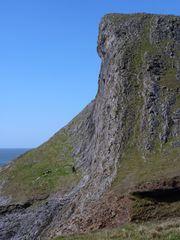
Juniper Wall is triangular with prominent overhangs at its apex above the lower slabs/wall. A large overlap runs down from a corner beneath the centre of the main overhangs.
In the centre of the crag below the overhangs is a slightly right-slanting groove and thin crack (Assassin). This is crossed at one and two-thirds height by two cracks rising leftwards across the crag, parallel with the right skyline.
Directly below the nest and about 4m below the overhangs is a clutch of pegs known as The Junction Stance.
The lines, although good, tend to be a bit difficult to follow, so read the descriptions carefully. Belays on the top of the cliff are positioned well back.

- The Jackal Finish 50m E2,5c *
Climb any route to reach the Junction stance. Move up and left into an impending triangular corner (ancient bolts). Climb the corner to a huge PR and swing left onto a rib. Continue left for 3m, then pull up and right into a groove. Either traverse left up this groove to finish, or pull directly up to a ledge and finish up steep rock. - Overkill 48m HVS,4c,4c
Good, slightly bold climbing on the P1, is a little spoiled by the P2, which is nothing more than a few metres of independent climbing used to reach the top of Assassin.- 24m Start at the left side of the crag, below a crack in the slab 5m left of the prominent niche of Killer's Route. Climb the crack, then curve rightwards on discontinuous cracks below the overlap to gain the Junction Stance, 4m below the main overhangs, PB.
- 24m Traverse right, bearing upwards, keeping about 2m below under the overlaps, to reach a more open area of rock. Finish diagonally right up these cracks (Assassin).
- Killer's Route 42m E2,4c,5b *
Start below and left of the slightly rightward-slanting shallow central groove by a wide slanting crack and slab.- 20m Climb up left to a large triangular niche. Surmount the overhang above and continue up a crack to The Junction Stance, PB.
- 22m Traverse rightwards for 3m and pull into a small overhung ledge in the corner. Pull over to another overhung ledge, quit it on its right and continue up steep but easy ground.
- Haaievinnesoep 35m E4,4b,6a
- 20m As for Killer's Route to the Junction Stance.
- 15m Clip the PR high up above the belay from the corner (The Jackal Finish) and step back down. Climb the headwall directly above the belay (crux) to gain an obvious scoop, 2PRs. Follow easy ground to finish up the corner above the Zygon nest.
- Barracuda 38m E5,6a,5c *
A daring route following the obvious crozzly line left of Assassin.- 18m Climb directly up to a v formed by Assassin crossing Hair Raiser low down. The initial hard moves up to the start of the crozzly flakes are well protected by a good wire, but there then follows a 12m run out on tricky 5c moves to a jam crack. Place gear, breathe a sight of relief and amble easily up to an obvious leftward traverse leading to The Junction Stance.
- 20m Gain P2 of Killer's Route, by pulling up right round the arête above the stance.
- Assassin 45m HVS,5a ***
Superb climbing up the rightward-slanting groove in the centre of the cliff. The best route on Gower at this grade. Climb the crack and slab that lead to a groove and a shallow niche at 21m. Continue using the twin cracks above, move right around the bulge and then left to a broken groove. Follow this with difficulty to a ledge, then move left to finish up a scoop. - Perch 35m E1,5b
Compared to Barracuda this is a sea cucumber. Climb to the overlap as for Trevor, The Pint and The Pram then continue up a pair of thin cracks to the break of Dry Riser. The wall above is climbed to the top finishing about 3m right of Assassin. - Trevor, The Pint And The Pram 33m HVS,4c * aka Hitman.
Start below the obvious jammed block at 7m, to the right of the Assassin groove. Step onto the block from the left and continue up a vague rightward-sloping crack. From the upper diagonal crack (Dry Riser) move diagonally right across a steep wall, to gain a broken crack and follow this slightly left to the top. This route was referred to as Hitman[1] in previous guides. - Rattle And Hum 35m VS,4c
Start 2m right of Trevor, The Pint And The Pram and climb a rightwards slanting crack to the upper traverse line (Dry Riser) and a niche. Finish up the right-hand of the two shallow cracked grooves. - Task Force 36m VS,4c
Start at a small recess below a vague right-slanting groove 5m right of Hitman. Follow the groove rightwards to gain the upper traverse line (Dry Riser), then finish up the tricky groove above. - Ninja 30m VS,4b *
Right of Task Force, just left of the start of the start of the diagonal crack of Hair Raiser, climb directly to a hanging block at 3m, then follow a zig zag crack to a shallow niche on the upper diagonal line (Dry Riser). Continue up left through a black bulge, to another shallow niche. Bear right to finish. Lacks definition and is slightly loose. - Hair Raiser 44m HVS,5a,4c *
This follows the lower of two leftward-slanting cracklines across the face. Start at the right end of the crack.- 24m Follow the crack to the apex of the easy angled slab below Assassin. Continue along the steepening crack and strenuously across a bulging wall to a niche (Killers Route). Continue for 4m to belays in a small recess.
- 20m Move left to an overlap and follow it down for 4m. Pull up left at a slight break, to another overlap. Traverse left beneath this to finish at the gully.
- On The Horizon 24m VS,4b *
Start at the bottom right-hand end of the lower diagonal crack (Hair Raiser), 5m left of the prominent black scoop (Socialist Worker). Follow parallel cracks rightward until they peter out, move right and up to a recess, taking care with the rock. Finish directly. - On The Horizon Direct 24m VS,4c *
Climb the crack between On The Horizon and Socialist Worker, to join the former at 10m. - Socialist Worker 27m VS,4c *
It keeps going left. Start at a shallow triangular black-stained scoop about halfway between the starts of the two diagonal traverse lines. Climb to the upper traverse line (Dry Riser), step left and climb the tricky groove as for Task Force. It is possible to climb 1m right at about the same grade. - Dry Riser 67m HVS, 4c,4c**
A girdle taking the higher of the two diagonal cracks. Start at the right side of the cliff where the crack meets the ground.- 36m Climb the crack to below the main overhangs. Traverse 6m left to The Junction Stance.
- 31m Traverse left for 7m and break through the overlap, just left of a tiny corner. Continue up and left to easy ground.


FIRST ASCENTS
- The Jackal Finish - M.Hogge 1pt 1968 FFA J.Bullock, G.Evans June 1982
- Overkill - SUMC P1 1968, M.Harber, D.Parsons P2 1981
- Killer's Route - SUMC P1 1968, G.Evans, J.Bullock P2 June 1982
- Haaievinnesoep - G.Ashmore, J.Tracey 2nd August 1997
- Barracuda - A.Sharp, J.Harwood 3rd July 1982
- Assassin - E.Pardoe 1968 FFA J.Bullock, R.Thomas 22nd June 1980
- Perch - G.Evans, J.Bullock 8th October 1989
- Trevor, The Pint And The Pram - SUMC 1968
- Rattle And Hum - C.Allen, L.Cain 1986
- Task Force - M.Harber, C.Horsfield 1982
- Ninja - C.Allen, M.Danford, A.Beaton 1990
- Hair Raiser - M.Harber, S.Robinson 1982
- On The Horizon - G.Richardson, J.Pratt, C.Lownds 1981
- On The Horizon Direct - A.Beaton, C.Allen, M.Danford 1990
- Socialist Worker - L.Moran, K.Snook, G.Richardson 1977, J.Beynon, J.Clapham Variant 2001
- Dry Riser - M.Harber, J.Mothersele 1977
Additional Photos

Packing up at the top of Juniper Wall


Notes
- ↑ This route referred to as Hitman (J.Bullock & G. Evans, 1977) in both Richardson (1991) and Danford/Penning (1983). It seems this route was done in 1968 but not recorded in Talbot (1970). It's remarkabke that Talbot doesn't appear to have climbed on Juniper Wall. He must have seen it. It’s not included in the Supplement either.